.png)
Portal - Quick Charge and Create Payment - Canada
Accept payments directly in the Payrix Portal.
The Payrix Portal enables merchants to process transactions without any backend development. Using the Portal, merchant’s can accept credit/debit sale transactions, auth only transactions, and ACH/eCheck transactions. The Portal supports using saved or new payment methods.
The Payrix Portal provides two ways to accept payments:
Quick Charge - Use the Quick Charge form to process transactions directly on the merchant Portal dashboard.
Create Payment - Use the Create Payment form to add tips or submit the transaction for Level II processing.
See the Quick Charge and Create Payment sections below for details about using each feature. The Payment Method section describes the form you will use to enter a new payment method if needed.
Quick Charge
The Quick Charge form enables merchants to process transactions directly on the merchant’s Portal dashboard. The image below shows the Quick Charge form:
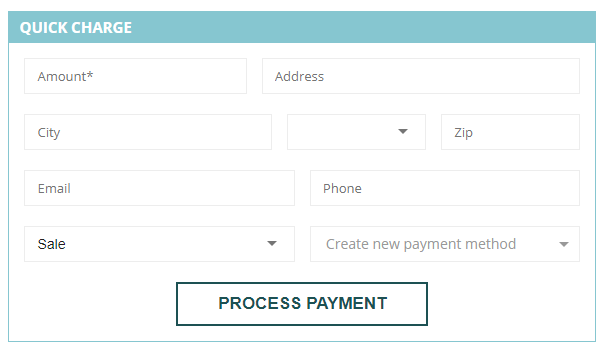
The Quick Charge form is displayed on the merchant’s Portal dashboard after logging in.
To accept a payment, fill in the form and click the Process Payment button. The following fields are required:
Amount - The amount of the sale.
Transaction Type - The type of the transaction: Sale, Authorization Only, or eCheck Sale.
Payment Method - Select an existing stored payment method or select “Create new payment method” to enter new payment details. If you select “Create new payment method”, the Payment Method form will display when you click the Process Payment button. See the Payment Method section for details.
The address and contact information fields are not required; however, excluding this information may result in a transaction hold or an issuer decline depending on your portfolio’s AVS and Risk settings.
Important Info for Canadian Merchants submitting address field data:
provincefields replace thestatefields (see valid values here).postalfields replacezipfields (see valid values here).currencywill be in CAD.
Create Payment
To process transactions that include tips or that require Level II processing, use the Create Payment form. To open the Create Payment form, select Create Payment from the Payments menu in the Portal, as shown below:

The Create Payment form, shown below, opens:
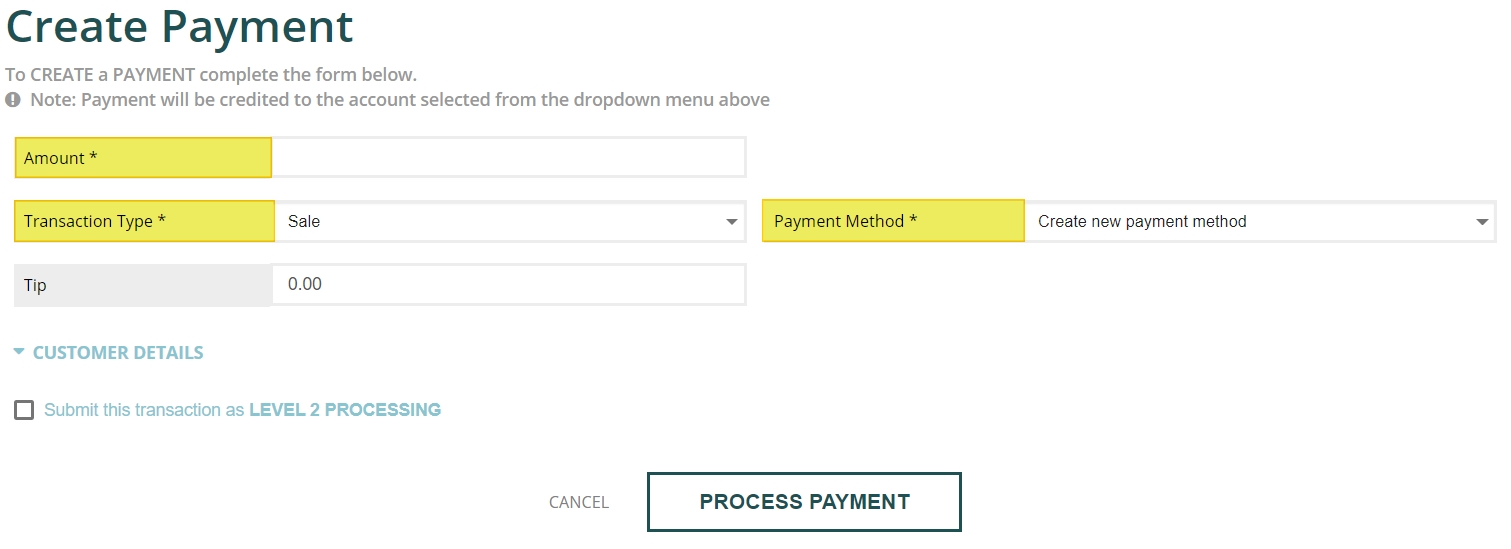
To submit a transaction, fill in the fields on the form and click the Process Payment button. The following fields are required:
Amount - The amount of the sale in CAD.
Transaction Type - Select the transaction type: Sale, Authorization Only, or eCheck Sale.
Payment Method - Select whether to use an existing stored payment method or select “Create new payment method” to enter new payment details. If you select “Create new payment method”, the Payment Method form will display when you click the Process Payment button. See the Payment Method section for details.
To add customer information to the payment, click on the arrow to expand the Customer Details fields. The image below shows the Customer Details fields:
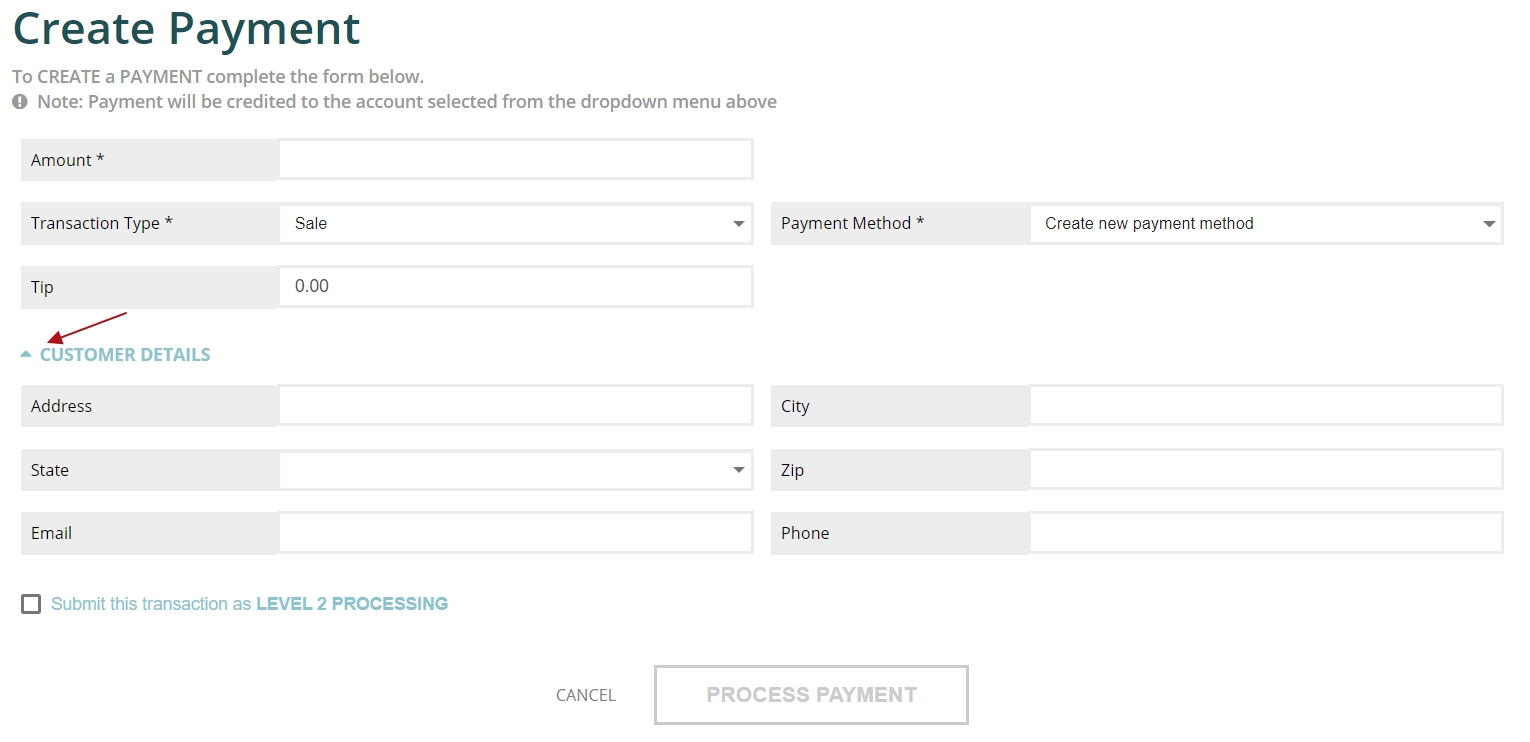
To submit the transaction for Level II processing, select the “Submit this transaction as Level 2 Processing” checkbox at the bottom of the form.
Payment Method
If you select “Create new payment method” from the Payment Method drop down menu on the Quick Charge or Create Payment form, a payment method entry window will open after you click the Process Payment button.
The image below shows the payment method entry form for credit/debit card sale and auth only transactions:
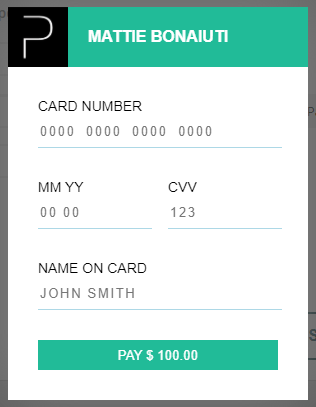
For credit/debit card sale and auth only transactions, the following card data is required:
Card Number - The account number on the card.
MM/YY - The card’s expiration date.
CVV - The security code on the card.
Name on Card - The cardholder’s full name as it appears on the card.
For ACH/eCheck payments the fields displayed on the payment form are different.