Partner Improvements
Portal Color Selector
Payrix offers an expansive API and a best-in-class merchant portal, creating an end-to-end service for partners and merchants. The Payrix product is fully available for white-labeling to allow partners to carry the look and feel of their brand throughout their merchant/ customer journey. To offer partners an upgraded Whitelabel experience, Payrix now offers customizable color selectors for the merchant portal. This will allow partners to maintain their branding and color scheme throughout their software and into the Payrix white-labeled solution.
How to:

Color Scheme - Payrix now offers a configurable color scheme in the merchant portal. This is available in both the sandbox and production environments. In a few easy steps, partners can now set the primary color of the merchant portal to create a seamless experience from the partner's platform to the merchant portal
How to set your portal color:
Step 1: Log into your merchant portal
Step 2: Navigate to the settings section on your dashboard
Step 3: Locate the color selector option under Whitelabel
Step 4: Use the color selector theme object to select the correct color or input the correct color number
Step 5: Save the color
Step 6: Make sure the color you want to display is marked as default, and this will populate in the merchant portal to provide a more seamless experience between your platform and the portal.
Login Screen Template Customization
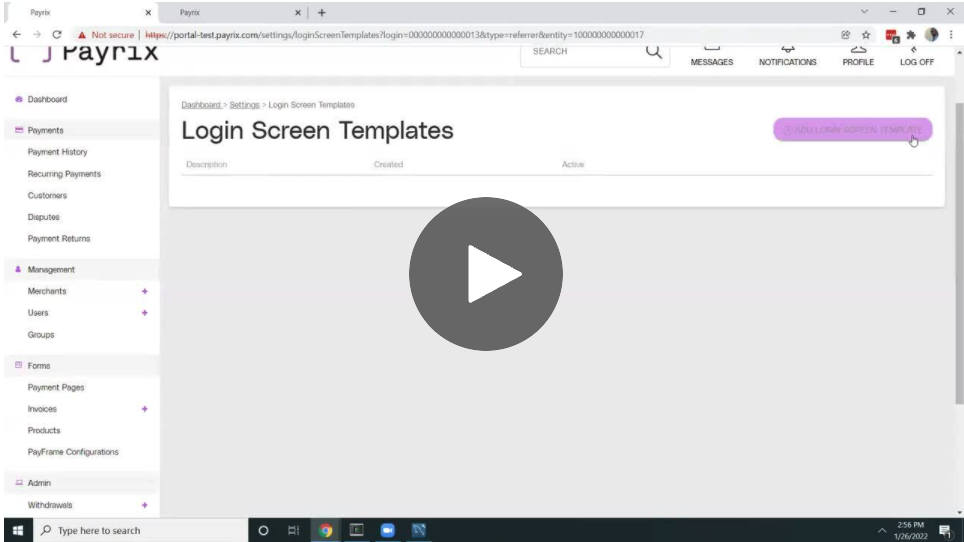
Payrix offers partners the ability to create a customized login screen. Partners will be able to select from 4 different pre-built templates and upload a picture of their choosing as a background. Additionally, clients can change their logo and input the desired text to customize the login screen.

How to set up your custom login screen:
Step 1: Log into your merchant portal
Step 2: Navigate to the settings section on your dashboard
Step 3: Locate the login screen templates under Whitelabel
Step 4: Click add login screen template and select the template of your choice
Step 5: Customize your login in template by adding the text of your choice and uploading a photo using the background image selector; this photo will populate on the login screen.
Step 6: Select your primary and secondary colors and click add
Step 7: Set your new login template to “Active” and save your work
You will now see the new template on your login screen to display a picture of your choice, color, and feel of your brand throughout the user experience.
.png)