Refund or void a transaction in the Portal
Use the Payrix Portal to refund or void a transaction.
This page provides step-by-step instructions for refunding or voiding a transaction using the Portal:
Step 1 - Locate the transaction
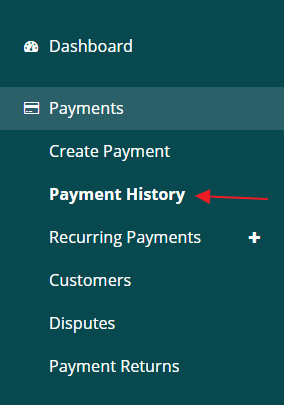
Locate the relevant payment that you would like to refund by selecting Payment History on the Dashboard menu.

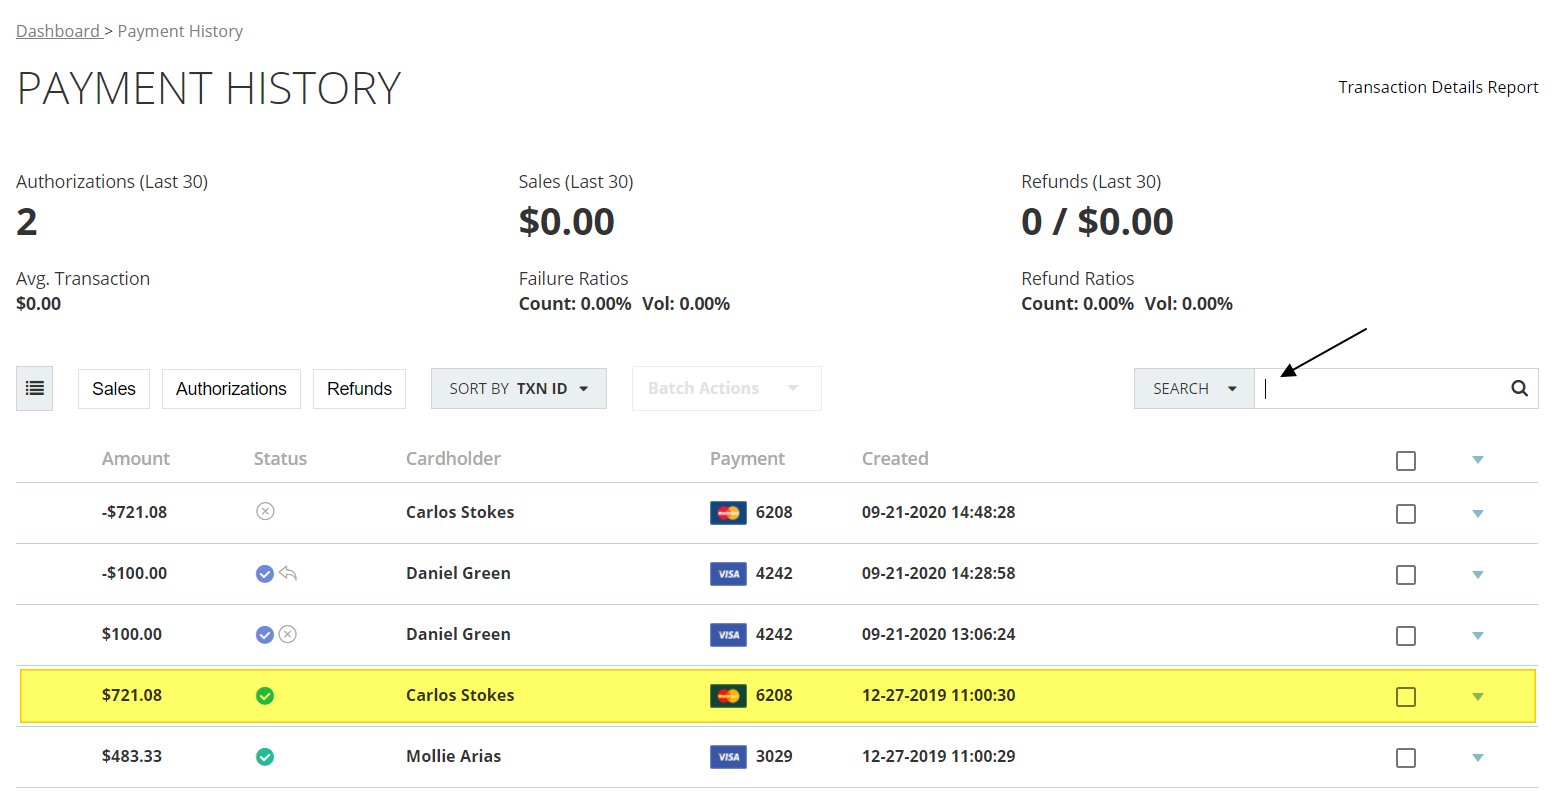
The Payment History page will list the Merchant’s previous transactions, and you can scroll down the page to locate the relevant transaction or enter the Transaction ID, cardholder’s name etc. in the search bar to pull up the payment you want to refund.

Step 2 - Select the Refund option
When the relevant transaction is selected from the Payment History page, you will be redirected to the payment’s profile page. On the payment’s profile page hit the ‘refund’ icon.

If the transaction status is still approved you can follow this same process to void or cancel the payment.

Step 3 - Enter the Refund amount
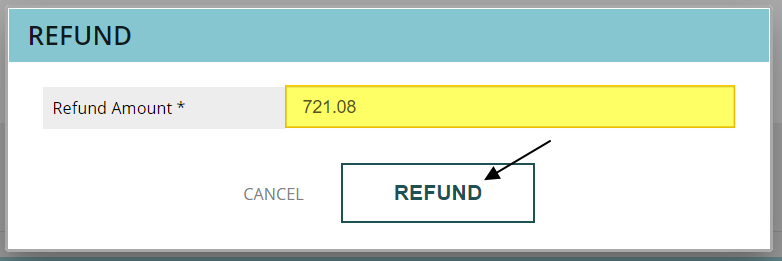
Once the refund icon is selected a popup will appear indicating the refund amount. By default, the entire original payment amount will populate the field, but you can enter any amount less than the original transaction amount to issue a partial refund.
Once your desired refund amount is set, hit Refund to complete the process.

Once a refund is submitted a related refund transaction with a unique Transaction ID (TXN ID) and profile page will be created within Payrix, in addition to the original payment’s profile. You can locate the original payment’s profile by selecting the Related Transactions tab on the refund's profile page (and vice versa).
.png)