You can edit the user access capabilities to reflect changes in users' responsibilities and ensure the security of your portal account. Any portal user with another user boarded under their account can edit access for that user at any time. This tutorial describes how to edit the access role for an existing user.

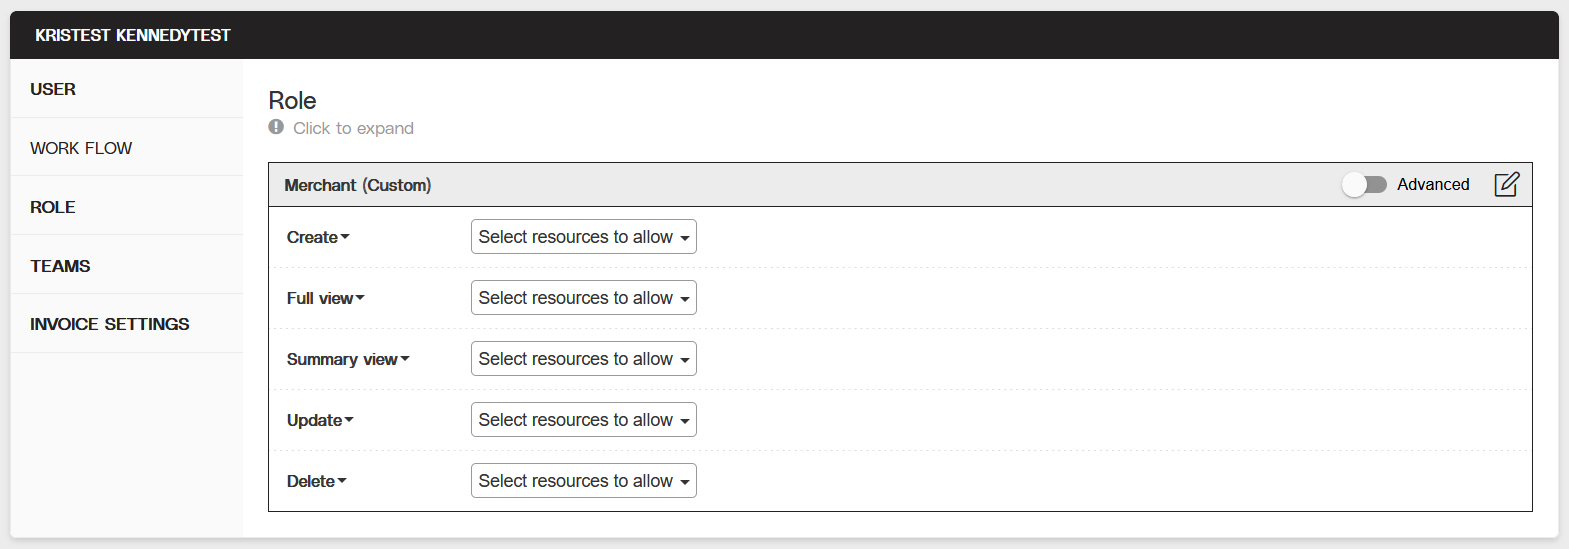
Partial view of the User Profile page, including the Role tab and customizable resource dropdown menus.
Objective
Update user roles for access to specific resources in the portal.
Audience
Partners
Merchants
Environment
Portal (Sandbox)
Portal (Production)
Prerequisites
Notes
You must have a fully boarded Payrix Pro account to perform any of the actions described in the use case guides.
Make sure you have the full name of the user as it is written in the portal.
Important notes
Important!
User role access levels can only be assigned to new users based on your account level.
For example, a Merchant cannot give Referrer Full Access to another user, but a Partner can grant this level of access to a Merchant.
Important!
The “parent” (admin) user of any child (standard) user can access and view the child user’s associated entity (Merchant) because its hierarchy is the source of the child user’s access to the portal.
As a result, the parent user will have full view of the child user’s Merchant account, but the child user is unable to view the parent user’s view.
Important!
Deactivating Partner-level parent users that are associated with the entity’s API key or are the primary parent user login will remove access from all associated child users to their respective entity (Merchant).
Important!
Your browser cache may not allow you to see your changes reflected immediately when updating an existing user’s roles. If this happens, try clearing your browser cache or reloading the page in a private or incognito browser window.
Tips
Tip
If a person acting as the parent user needs to be changed, use the following steps to repurpose the parent user with new information and login credentials:
Change the user’s email address to a new and relevant company email address.
Confirm the new email address with the verification email sent from the platform.
Log in to the parent user using the new email address and update relevant information: username, password, name, and so on.
Tip
Partners have the flexibility to give or restrict their Merchants' access to the portal.
We offer a large number of integration options for your clients to perform essential platform functions directly on your product offering or for you to manage these functions on their behalf.
Tip
An access template can be used while creating a new user by clicking ADD A TEMPLATE in the Create a New User lightbox. Access templates can set predetermined roles for new users to streamline the process, so you can add future users with similar roles using the template.
Additional Resources
See the tips below to help you get started.
For more information on the types of portal users and their roles, see Users Roles.
For more information about access templates, see Understanding Access Templates.
Customize User Access Roles
Ensure that you complete all steps in the following sections.
Open the User Profile Roles Tab
Click USERS under the Management category in the left navigation panel to open the Users page.
Locate the desired user in the Users table and select any information to open the User Profile page.
Click ROLE in the left panel.
Result: Your page now displays the user’s roles settings.
Customize User Roles for Specific Resources
Toggle the ADVANCED button to ON in the upper-right corner of the Roles tab.
Click the dropdown menu for each Action category to view all possible associated resources. The following Action categories are available: Create, Full view, Summary view, Update or Delete.
In an Action category dropdown menu, you can customize the user roles by selecting individual resources. You can also click ALL to give the user access to all related roles or NONE to remove all access for that category.
(Optional) Expand each selected role resource under each action category to reveal sub-resources that can be enabled or disabled at any time.
Click Save in the upper-right corner to complete the process.
Result: The user role preferences are updated in the portal.
Next Steps
After updating the user roles, follow the optional guides linked below to further customize your users' access to the portal.
Create a User Access Template: Apply an access template and its customized resource settings to any user that is added to your account in the future.
Create a User Team: Create a team to help you streamline work flows and user role assignments.
Conclusion
After you have updated the roles in the portal, they will update the user’s capabilities immediately.