User Actions
The User Actions section contains two drop down menus, located at the top of the page. The top drop down menu is the Divisions drop down menu, and contains a list of all Divisions associated with your account. The bottom drop down menu is the Batch Actions drop down menu.
To use the User Actions drop down menus:
Select a division in the Divisions drop down menu.
Click the SEARCH button next to the Divisions drop down menu, and all members of that division will populate the Multi-Factor Authentication Users Table.
(Optional): Click ENABLE in the Batch Actions drop down menu to enable batch actions related to MFA for all members of a division selected in Steps 1 and 2 above.
(Optional): Use the Action Buttons below the Batch Actions drop down menu to filter the Users Table results by MFA enrollment status. See the Action Buttons section described below for more information.
(Optional): To reset your search, click the RESET button located to the right of the Search button.
The Action Buttons section is located below the User Actions Section and is used to sort users in the Multi-Factor Authentication Users Table. The action buttons include the following items:
Action Button Name | Description |
|---|
Enabled | User who are allowed to enroll in MFA |
Disabled | Indicates that MFA has not yet been enabled, or the user is in the processes of resetting their MFA due to lost/stolen device, forgotten password, or other security-related issues. |
Enrolled | Users who have set up and currently use MFA. |
Not Enrolled | Users who have MFA enabled on their accounts but who have not completed the enrollment process and do not currently use MFA. |
To use the action buttons:
Select the division you want to view from the Divisions Drop Down menu or omit this step if you want to view users from all divisions.
Click the action button that you want to sort by.
The Multi-Factor Authentication table will now repopulate with only the users with a status matching the selected action button.
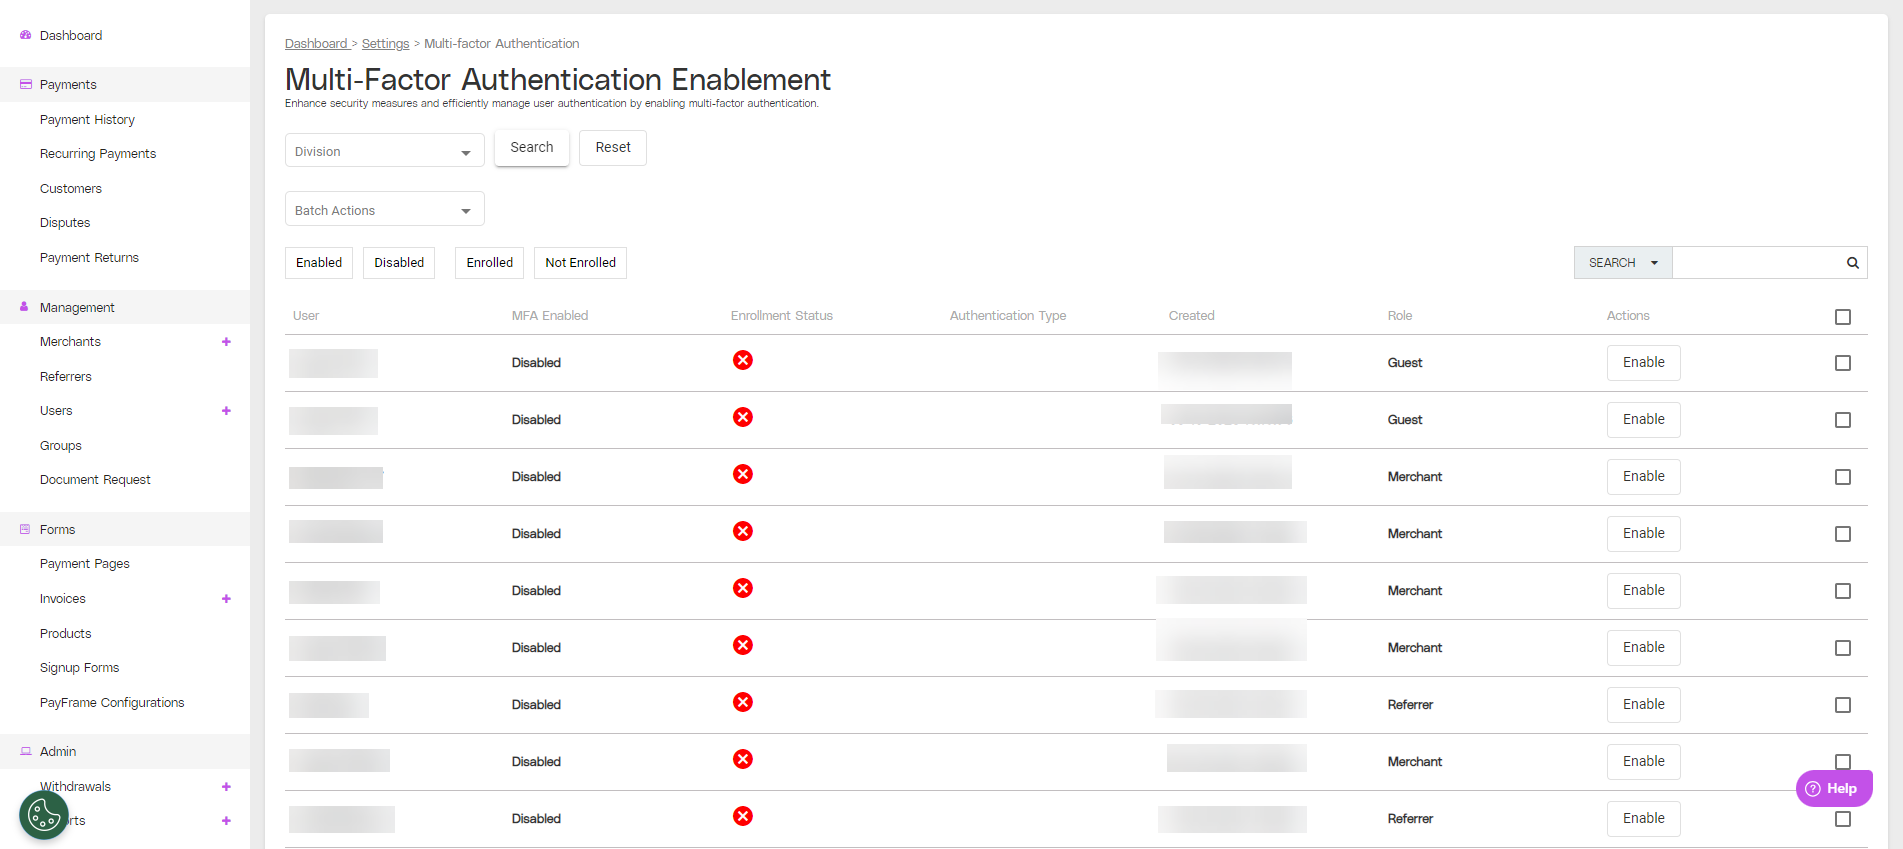
Multi-Factor Authentication Users Table
The Multi-Factor Authentication Users table displays a list of users and their MFA statuses. You can configure the table view by using the drop down menus and action buttons described in the two previous sections of this document. The table contains the following information:
Multi-Factor Authentication Users Table Column Name | Description |
|---|
User | The name of the Payrix user. |
MFA Enabled | Indicates whether multi-factor authentication (MFA) is enabled. Choose from Enabled or Disabled. |
Enrollment Status | Indicates the user's enrollment status for multi-factor authentication. Choose from Enrolled or Not Enrolled. |
Authentication Type | Indicates that a time-based one-time password (TOTP) MFA is used during login. |
Created | The date and time that the user’s MFA was enabled/disabled. |
Role | The role of the user. |
Actions | Click DISABLE to disable MFA on an individual user’s account, or click ENABLE to enable a user that is currently disabled. |
To perform batch actions:
Select multiple individuals by clicking the BOX icon on the right hand side of the table, or select all users by clicking the BOX icon in the table header.
Click the Batch Actions drop down menu at the top of the page.
Select the action from the drop down menu.
.png)